
Pickleball’s Third Shot Drop: The 3 Variations You Need to Know
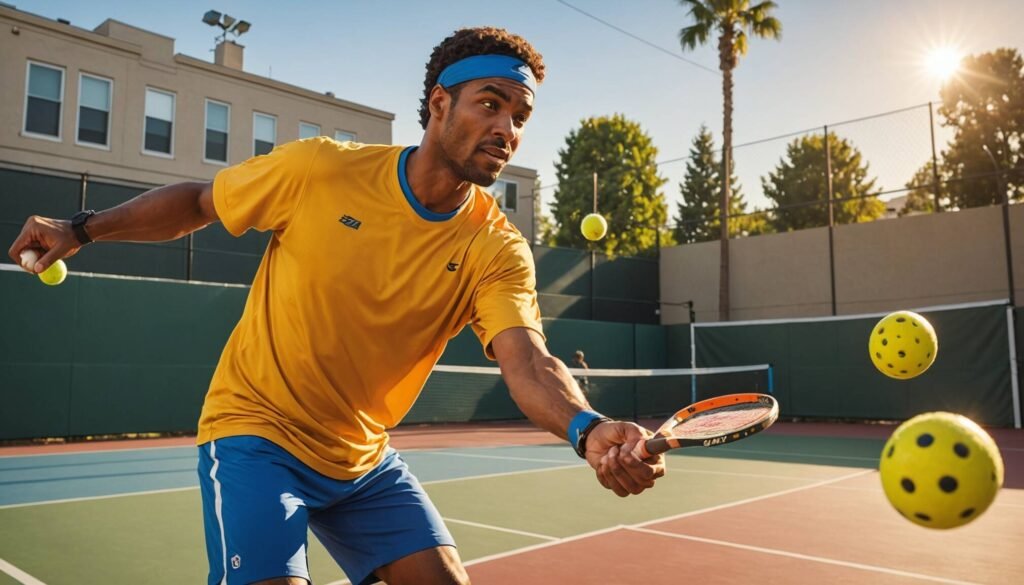
If you’ve been playing pickleball for any length of time, you’ve probably heard someone tell you to hit the third shot drop. Maybe you’ve practiced it, maybe you feel like you’ve got a decent handle on it. But here’s the thing most players never find out until they’re getting punished at the net: the third shot drop isn’t one shot. It’s three. And if you only know one of them, you’re giving your opponents a significant edge every single rally.
Pickleball coach Troy Akin, who runs the Troy Akin Pickleball YouTube channel, recently broke down all three variations in detail: the push drop, the shovel drop, and the drip drop. Each one has its own mechanics, its own purpose, and its own moment on the court. Understanding when and how to use each one is what separates players who are stuck at the 3.0 level from those climbing toward 4.0 and beyond.
Let’s go through all three, explain the mechanics honestly, and give you a clear picture of how to add them to your game.
Why the Third Shot Drop Is the Most Important Shot in Pickleball
Before getting into the variations, it’s worth being honest about why this shot matters so much. When you serve in pickleball, your opponents have a significant positional advantage. They’re already standing at the kitchen line, which is where all the power in this game lives. You’re stuck at the baseline, which is the worst place to be in a competitive rally.
The third shot drop solves this problem by forcing your opponents to hit upward on the ball. Because the drop lands low in the kitchen, they physically cannot attack it with pace. That upward contact gives you and your partner the time you need to move through the transition zone and get yourselves to the kitchen line where you can actually compete.
As Akin puts it plainly: “It is impossible for you to win a high-level pickleball game from the baseline.” That’s not hyperbole. It’s a structural reality of the sport. The drop shot is your vehicle for getting to the front of the court. Without it, you’re just absorbing punishment from a disadvantaged position until you lose the point.
If you’re still sorting out which shots deserve your practice time first, this breakdown of essential shots puts the third shot drop right at the top of the priority list, and for good reason.
For Beginners: What Is a Third Shot Drop and Why Should You Care?
If you’re newer to pickleball, here’s the simplest way to think about it. In pickleball, after the serve and the return, the serving team has to hit a third shot. At that moment, the other team is already up at the kitchen line, ready to attack. The serving team is way back near the baseline, essentially at a disadvantage.
The third shot drop is a soft, arcing shot that lands gently in the kitchen area near the net. Because it lands low, the opponents can’t smash it back hard. They have to hit it upward, which buys you time to walk or jog up to the net. Think of it like a chess move that neutralizes your opponent’s positional advantage. It’s not flashy. It doesn’t feel powerful. But it’s the shot that makes everything else in the game work.
Most beginners try to just hit it hard and hope for the best. That’s exactly the wrong instinct. The drop is all about touch, timing, and placement. And as you’re about to learn, it comes in three distinct flavors depending on the situation you’re in.
Variation 1: The Push Drop — Your Workhorse Third Shot
The push drop is the one you’ll use most often, roughly 70% of the time according to Akin, and it’s the foundation everything else is built on. When you have a normal ball coming to you and you can get your feet properly set behind it, this is your shot.
Akin calls it “Mr. Consistent,” and that name tells you everything about its purpose. This shot isn’t designed to blow anyone away. It’s designed to produce a reliable, high-arcing ball that lands at your opponent’s feet while you move forward to the net. Consistency is the entire point.
Grip and Setup
Start with a continental grip, or slightly eastern. Akin describes it as holding the paddle like you’re about to hammer a nail into a wall. The tip of the paddle faces up, and you relax your wrist until you get what he calls the “chair pose” — a natural, relaxed downward position.
Grip pressure is often overlooked, but it matters enormously on touch shots. Aim for about a three or four out of ten on the squeeze scale. Holding the paddle too tightly is one of the most common reasons drops either dump into the net or float up for an easy attack. A proper understanding of pickleball grips gives you a real edge on these shots.
The Most Common Mistake on the Push Drop
Wrist snapping. It happens at every level. Players think they need to add something with their wrist to generate precision or control, and the result is a ball that either slams into the tape or pops up invitingly for an overhead. Akin is emphatic about this: keep a straight, relaxed wrist. “It just starts down here and ends up up here,” he explains, describing a smooth, simple path.
Stance is the other major issue, particularly for players transitioning from tennis. The tennis habit of turning sideways with a big backswing makes soft, consistent contact nearly impossible in pickleball. Keep an open stance, get your body behind the ball with a small hop or step, and use a compact swing you can repeat without variation.
Two mental images Akin offers: picture yourself as a baseball infielder fielding a ground ball, keeping the ball between your legs. Or picture yourself playing cornhole, just trying to drop a bag into the circle at the far end. Both images help your brain dial in the soft, controlled motion this shot requires.
Contact point: in front of your right knee on forehands, left knee on backhands. Paddle angle at roughly 45 degrees, like a golf wedge. You’re not trying to bomb it over a bunker. You’re trying to land it soft on the green from a comfortable distance. That’s the entire mentality. Mastering the push drop is about ingraining that mentality until it’s automatic.
Variation 2: The Shovel Drop — Your Emergency Escape Hatch
The shovel drop exists because pickleball is not a controlled laboratory environment. Sometimes your opponent crushes a return deep into the corner and you can’t get your feet set. Sometimes a previous shot sits up and they put pressure on you, leaving you scrambling. In those moments, the push drop isn’t available. You need something else.
The shovel drop is your get-out-of-jail-free card. Knowing your options from the baseline in difficult situations is what separates reactive players from genuinely smart ones.
What Makes It Different
The key mechanical difference is the wrist. Instead of keeping a relaxed, neutral wrist, you lock it. Akin describes it as your arm becoming a shovel or a scoop, coming out and through at the point of contact. That locked wrist position is what lets you get underneath a ball that’s gotten behind you and still lift it back into the kitchen with enough arc.
The grip stays the same — continental or slightly eastern — but the wrist mechanics are fundamentally different from the push drop. For forehands, lock the wrist to create a natural 45-degree wedge. For backhands, lock it in the backhand position. Either way, the wrist itself is quiet and stable throughout the swing.
The power source shifts entirely. You’re not using wrist muscles at all. Your legs provide the foundation, and your shoulder acts as the hinge that lifts the ball. Strong legs, strong shoulder drive, quiet wrist. That’s the formula.
When to Use It and When Not To
The contact point for a shovel drop tends to be behind the body rather than in front, and that’s intentional. If you tried to make contact in front of you with a locked wrist in this position, your paddle face would point straight up and the ball would go vertical. Meeting it slightly behind you creates the natural loft you need.
Use it when a hard return pushes you off balance, when you need a fifth shot or seventh shot drop because earlier attempts didn’t land well, or when you’re genuinely pinned deep with no time to reset your feet. These transition zone escape tactics pair directly with the shovel drop when you’re caught between the baseline and the kitchen.
The mistake Akin sees constantly is using the shovel drop out of laziness rather than necessity. Players reach for it as a default because they didn’t bother taking an extra step to get properly set. The shovel drop is a backup tool. If you have time to take one more step and hit a clean push drop instead, take that step. Move your feet first, then assess which drop you actually need.
Variation 3: The Drip Drop — The Shot Your Opponents Probably Haven’t Seen
Here’s where it gets genuinely interesting. The drip drop is the most underused shot among recreational players, and it might also be the one that adds the most pressure to your game when used at the right moment.
The name comes from combining “drive” and “drop.” You’re still landing the ball in the kitchen, but you’re hitting it with heavy topspin. The result is an aggressive drop that bounces into your opponents aggressively, is much harder to read, and puts real pressure on their ability to reset. Understanding how to hit heavy topspin gives you the mechanical base you need to execute this shot reliably. The drip shot guide from The Dink goes even deeper on the mechanics.
How to Execute It
Use a slightly eastern grip here, maybe a touch less continental than the other variations. You’re generating topspin, which requires a slightly different paddle face angle through contact.
Keep both feet square and take the ball out in front, similar to a push drop setup. But the swing path changes completely. Think six o’clock to three o’clock to twelve o’clock. That brushing, upward path is what creates the topspin-sidespin combination that gives the drip its character.
Akin’s other mental image for this: you’re picking up a phone. The motion from six to two on the clock generates that side topspin that causes the ball to drop fast after crossing the net and kick into your opponent when it bounces. When executed well, that combination is genuinely difficult to attack.
Risk vs. Reward
The drip is a higher-risk, higher-reward shot than the push drop. Because you’re hitting with more pace and spin, net clearance becomes critical. If the ball sits up even a few inches too high, your opponent has a shoulder-height ball to attack, and you’re suddenly in serious trouble.
Arc targets: for a push drop, Akin aims for a peak height around 5’5″ to 6 feet. For the drip, keep it lower, in the 4-foot to 5’7″ range. The topspin does the work of bringing it down quickly after it crosses the net.
The biggest mistake players make with the drip is treating it like a hard drive with drop intentions. When it’s overhit, it sits at the perfect height for an attack. Suddenly you’re scrambling for a shovel drop, exactly what you were trying to avoid.
One more thing: because the drip is hit with more pace and stays lower, you need to be moving to the kitchen the moment you make contact. If you admire your shot and hesitate, you’ll be caught in no man’s land while your opponent takes their time setting up an attack. Getting to the kitchen is its own skill, and mastering the transition from baseline to kitchen line is the natural complement to every drop variation you develop.
How to Choose the Right Variation in Real Time
Knowing all three shots is one thing. Selecting the right one in half a second during a live rally is another. Here’s Akin’s simple decision framework.
If the return is manageable and you can get your feet set: push drop. This should be your default about 70% of the time. Relaxed wrist, compact swing, high arc, move forward.
If the return is hard and gets behind you or pushes you off balance: shovel drop. Lock the wrist, use your legs and shoulder, scoop yourself back into the rally. This is your emergency option, not your comfort zone.
If you crushed your serve and get an easy third with time to set up: consider the drip. Get behind the ball, dip the paddle head, brush up with that six-to-twelve clock path, and hustle to the kitchen immediately after contact.
Players who master all five third shot options can read any situation and respond with the right weapon. But even getting these three dialed in gives you a massive advantage over players relying on a single approach.
The Most Important Thing Nobody Tells You About Third Shot Drops
One mental shift that matters more than any mechanical tip: you don’t have to win the rally with your third shot drop. You just have to use it as a vehicle to get to the kitchen.
If you hit a good drop, move fast. Get to that kitchen line and be ready to dink. But if your drop is mediocre or gets attacked, that’s not the end of the world. Plant your feet in a split step, absorb the next ball, and hit a fifth shot drop. Or a seventh. Or a ninth. Keep working your way to the net.
Advanced players don’t panic when a drop doesn’t land perfectly. They simply reset and try again, understanding that the process of getting to the kitchen is often multi-shot and that’s completely fine. The full third shot drop guide covers this patient, systematic approach in more detail.
The players

