
New to Pickleball Drilling? Try This Simple 45-Minute Practice Plan
Most intermediate pickleball players say they want to improve, but they rarely spend time actually drilling. When you search for drill videos online, you’ll find plenty of content featuring high-level pros executing moves that feel completely out of reach. The good news? Drilling doesn’t have to be complicated or intimidating.
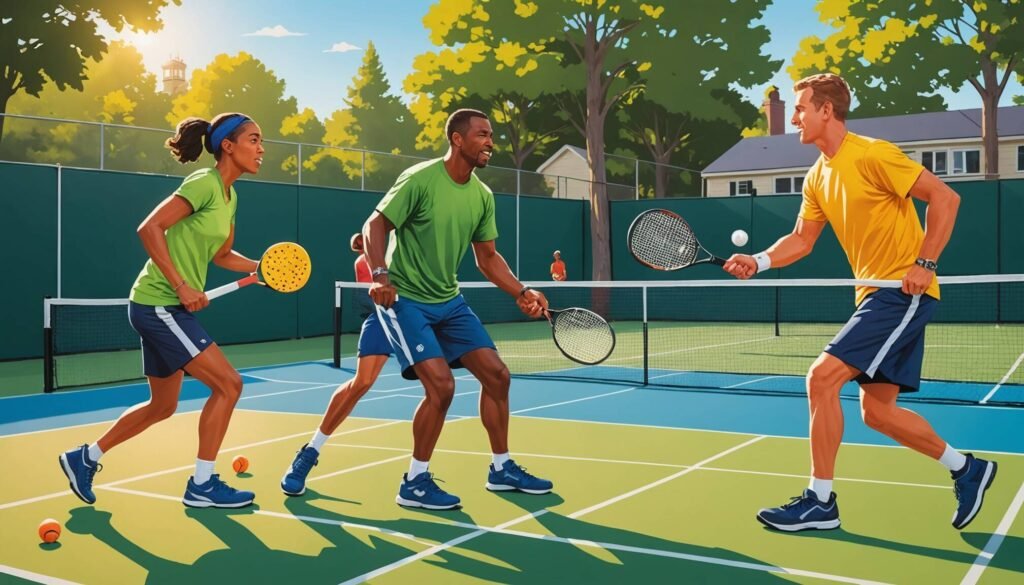
According to Coach Jess from Athena Pickleball, all you really need is a focused plan, a couple of friends, and 30 to 45 minutes of quality repetitions. In a recent video, she walks through a simple 45-minute practice session designed specifically for intermediate players around the 3.0 to 3.5 level that you can copy and adapt for your own game.
The reality is that many players show up to open play, hit some balls, play a few games, and leave without ever working on specific weaknesses. They wonder why their game plateaus. Structured drilling is what creates real improvement, and it doesn’t require an expensive coach or hours of commitment. What it does require is intentionality and a willingness to focus on specific skills rather than just playing recreational games over and over.
Understanding the Purpose of Structured Drilling
Before diving into the specific drills, it’s worth taking a moment to understand why structured practice matters so much in pickleball. If you’re relatively new to the sport or haven’t spent much time drilling, you might wonder what the difference is between just playing games and doing repetitive practice exercises.
Think of it this way: when you play recreational games, you’re testing your skills under pressure, but you’re not necessarily building new ones. You tend to default to what you already know how to do, which means you reinforce existing patterns—both good and bad. Drilling, on the other hand, allows you to isolate specific shots and situations, work on them repeatedly until they become automatic, and then integrate them into your game.
For someone who might not be familiar with how athletic skill development works, consider learning to drive a car. You didn’t just get behind the wheel and start driving on the highway. You probably practiced parking, turning, and stopping in controlled environments first. Pickleball drilling works the same way. You’re creating muscle memory and mental patterns in a low-stakes environment so that when the pressure is on during a real game, your body knows what to do without you having to think about it.
The 45-minute practice plan that Coach Jess outlines is particularly effective because it combines three essential elements: warming up with cooperative drills to build consistency, adding competitive pressure to simulate match conditions, and finishing with actual gameplay to tie everything together. This progression ensures that you’re not just mindlessly hitting balls but actually training your brain and body to perform under the conditions that matter.
Start Simple: The Dink Warm-Up
Coach Jess begins the session with a straightforward dink warm-up. Players line up on one side of the court and simply alternate dinks, moving the ball around to get a feel for control and lateral movement. It sounds basic, but there’s a purpose here: you’re building consistency and keeping the ball in the kitchen without overthinking it.
The beauty of this warm-up is that it gets everyone loose without demanding perfection. You’re not trying to hit winners or make spectacular shots. You’re simply focusing on soft hands, good contact, and keeping the ball low over the net. This is especially important for intermediate players who often rush into more complex drills before their bodies are properly warmed up and ready to perform.
Once everyone is loose, Coach Jess adds a competitive element. Instead of just hitting dinks back and forth, the group tries to reach a target number like 30 consecutive dinks as a team. This small shift creates just enough pressure to simulate match conditions while still keeping things cooperative. You’re not playing points yet, but you’re training your brain to handle a little stress, which is exactly what happens in real games.
The psychological aspect of this drill shouldn’t be underestimated. When you’re trying to reach a specific number as a group, everyone becomes invested in the outcome. If someone makes an error at 28 dinks, there’s a collective groan, and you start over. This creates a low-level stress response that’s similar to what you experience when you’re at 9-9 in a close game. You’re learning to execute under pressure without the high stakes of actual competition.
For players who are new to drilling, this warm-up also establishes the rhythm and pace of the practice session. It signals to your brain that this is work time, not social time. While pickleball is certainly a social sport, effective drilling requires focus and commitment. Starting with a structured warm-up sets the tone for the rest of the session.
Pressure Dinking: When the Ball Gets High
Next comes the pressure dinking drill, and this is where things get more interesting. The rule is simple: you can only attack if the dink is high. If it bounces and stays low, you have to keep dinking. This forces players to stay patient, look for opportunities, and practice the transition from dinking to attacking without rushing.
This drill addresses one of the most common mistakes intermediate players make: attacking too early or from the wrong position. Many players see any ball above the net as an opportunity to speed up, but that’s not always the smart play. Sometimes the ball is high but you’re out of position, or your opponent is well-balanced and ready to counter. Learning to recognize the difference between a ball you should attack and a ball you should reset is crucial for advancing your game.
Coach Jess plays this out as a competitive point-based drill where players rotate positions based on wins and losses. It’s a game-like scenario that teaches decision-making under pressure. You’re learning when to be aggressive and when to stay calm, which is one of the biggest gaps between intermediate and advanced players.
The rotation system also ensures that everyone gets equal practice time in different positions. If you win the point, you might move to a more advantageous position. If you lose, you might have to work harder from a less favorable spot. This keeps everyone engaged and prevents the drill from becoming stagnant or predictable.
What makes this drill particularly valuable is that it mimics the natural flow of a real point. In actual games, you don’t just stand at the kitchen line and dink forever. Eventually someone speeds up, someone tries to attack, and the point transitions into a different phase. By practicing this transition repeatedly, you’re preparing yourself for the moments that actually decide matches.
Third Shot Drops: Reps with Purpose
The third shot drop is one of the most important shots in pickleball, and it deserves dedicated practice time. This is the shot that allows you to transition from the baseline to the kitchen line after the serve and return. Without a reliable third shot drop, you’ll find yourself stuck at the baseline while your opponents dominate from the kitchen line, which is not where you want to be.
Coach Jess sets up a structured drill where one player feeds balls and another practices drops from the baseline. The feeder stays at the kitchen line to make the drill realistic. This is important because practicing drops without a target or with unrealistic positioning doesn’t translate well to actual games. You need to see a player standing at the net, ready to volley, to truly understand the trajectory and touch required for an effective drop shot.
There are a few ways to add pressure to this drill. One method is to make 10 consecutive drops before rotating to the other side. Another is to reset the count to zero if you hit the net. You can also choose to only count the good ones, which forces you to commit to quality over quantity. Each of these variations creates a different kind of mental challenge and helps you develop the resilience needed for match play.
The key insight here is that drilling doesn’t mean hitting perfect shots in a vacuum. It means getting reps under conditions that matter. Coach Jess emphasizes that this is the time to work on what you actually want to improve, even if it means hitting some bad shots and learning from them. Too many players avoid practicing the shots they struggle with because they don’t want to look bad or feel frustrated. But that’s exactly backwards. Practice is where you’re supposed to make mistakes and figure out what works.
For intermediate players, the third shot drop is often the difference between being stuck at 3.5 and breaking through to 4.0. It’s a shot that requires touch, patience, and practice. You can’t just muscle the ball over the net and hope it lands short. You have to develop a feel for the paddle angle, the contact point, and the amount of energy you need to put into the shot. That only comes from repetition.
Another important aspect of this drill is the communication and feedback between partners. The feeder can tell the person practicing whether their drops are landing too deep, too short, or if they’re giving up attackable balls. This real-time feedback loop is invaluable and something you don’t get when you’re just playing recreational games. In games, people are focused on winning the point, not on helping you improve your technique.
Finish with a Game: Cutthroat
After all the focused drilling, the session wraps up with a game of cutthroat. This is where you apply everything you’ve practiced in a competitive, game-like setting. In cutthroat, each player keeps their own score, and you can only win points on the serving side. It’s a fun way to end practice while reinforcing the skills you just worked on.
The transition from drilling to gameplay is crucial. You’ve spent the last 30 to 40 minutes isolating specific skills and working on them in controlled environments. Now it’s time to see if those skills hold up when you’re actually competing. Cutthroat is perfect for this because it maintains a competitive edge while still being somewhat lighthearted and social.
One of the beautiful things about cutthroat is that it forces you to play with different partners and against different opponents throughout the game. This variability helps you adapt to different playing styles and prevents you from relying too heavily on a regular partner’s tendencies. It also keeps everyone accountable because you’re playing for yourself, not as a team.
Ending practice with gameplay also provides a sense of accomplishment and fun. Let’s be honest: drilling can sometimes feel tedious, especially when you’re working on shots that don’t come naturally to you. Finishing with a competitive game rewards the hard work you put in earlier and reminds you why you love playing pickleball in the first place.
From a learning perspective, the game portion allows you to test whether the skills you practiced are starting to transfer into actual play. Did you execute better third shot drops during the game than you normally would? Were you more patient during dinking rallies? Did you make smarter decisions about when to attack? These are the questions you should be asking yourself after practice.
Why This Approach Works
What makes this practice plan so effective is that it balances cooperation and competition. You start with cooperative drills to build consistency, move into competitive drills to add pressure, and finish with a game to tie it all together. You’re not just hitting balls; you’re training your mind to handle different situations.
The progression from cooperative to competitive to actual gameplay mirrors how learning happens in the brain. First, you establish the basic motor pattern in a low-stress environment. Then you add some pressure to see if the pattern holds up when you’re slightly stressed. Finally, you test it in the real environment where you’ll actually use it. This three-stage progression is backed by decades of research in motor learning and skill acquisition.
Coach Jess also stresses the importance of knowing what you’re working on. Before you start drilling, decide which skills matter most to you right now. Are you struggling with your backhand? Focus on that. Want to improve your third shot drop? Dedicate time to it. This intentionality is what separates productive practice from just hitting balls around.
Too many players show up to practice without a clear goal. They do whatever drill someone else suggests, or they just hit balls until they get tired. That’s not how you improve. You improve by identifying your weaknesses, designing practice sessions to address those weaknesses, and then measuring whether you’re making progress over time.
The 45-minute timeframe is also worth noting. It’s long enough to get meaningful repetitions but short enough that you can stay focused and maintain quality throughout the session. If you tried to drill for two hours straight, fatigue would set in, your form would break down, and you’d start reinforcing bad habits instead of good ones. Shorter, more focused practice sessions are almost always more effective than long, unfocused ones.
Making the Practice Plan Your Own
While Coach Jess’s structure provides an excellent framework, the beauty of this approach is that it’s highly adaptable. You can modify the drills based on what you and your practice partners need to work on. If your group struggles more with serves and returns, you could dedicate time to that instead of third shot drops. If you’re all solid on dinking but need work on transition play, you could adjust accordingly.
The key is to maintain the overall structure: warm up cooperatively, add competitive pressure, and finish with gameplay. Within that framework, you have enormous flexibility to customize the content based on your specific needs and skill level.
You also don’t need a large group to make this work. While Coach Jess’s video shows four players, you could easily adapt this for three players or even two if necessary. The principles remain the same: focused repetition, progressive difficulty, and intentional practice.
For players who practice alone or struggle to find drilling partners, many of these concepts can still be applied. You can work on third shot drops against a wall or use a ball machine if you have access to one. You can set up targets in the kitchen and practice hitting them from various positions. The more creative you get with your practice, the more you’ll improve.
Common Mistakes to Avoid During Drilling
Even with a solid practice plan, there are several common mistakes that can undermine your drilling sessions. One of the biggest is practicing too fast. Many players rush through drills, trying to get as many reps as possible in a short time. But speed without control is worthless. It’s far better to hit 50 quality shots than 200 sloppy ones. Focus on proper technique and gradually increase speed as your consistency improves.
Another mistake is avoiding the shots you struggle with. It’s human nature to want to practice what we’re already good at because it feels good and builds confidence. But real improvement comes from working on your weaknesses. If your backhand dink is shaky, that’s exactly what you should be spending the most time on during practice.
Lack of communication is another issue. During drilling, you and your partners should be talking about what you’re working on, what’s working, and what isn’t. If someone keeps making the same mistake, a quick tip or reminder can be helpful. This isn’t about being critical; it’s about helping each other improve. Good drilling partners hold each other accountable while remaining supportive.
Finally, many players fail to track their progress over time. It’s worth keeping a simple practice journal where you note what you worked on, how it went, and what you want to focus on next time. This creates continuity between practice sessions and helps you see improvement over weeks and months, even when day-to-day progress feels slow.
Taking Your Practice to the Next Level
Once you’ve established a regular drilling routine using this 45-minute framework, you can start to incorporate more advanced concepts. You might add video review, where you record your practice sessions and analyze your technique afterward. You could work with a coach for a few sessions to get personalized feedback on your form and strategy. You might join a dedicated drilling group that meets regularly and holds each other accountable.
The important thing is to stay consistent. One drilling session won’t transform your game, but regular practice over weeks and months absolutely will. Even if you can only dedicate 45 minutes once a week to structured

