Pickleball Drills at Home: How to Practice When There’s No Court Available
If you feel like your pickleball game has stalled out, the problem probably isn’t your technique. It’s your rep count. The players who seem to be improving faster than everyone else aren’t necessarily more talented — they’re putting in more focused contacts on the ball, and a lot of those contacts are happening outside of scheduled court time.
With USA Pickleball reporting participation growth of 223.5% over three years to roughly 13.6 million players, courts across the country are absolutely packed. You know the scene: eight people stacked on one court, a waiting list that burns your entire evening, and you end up touching the ball maybe 60 times in an hour of rec doubles. That’s not practice. That’s socializing with a paddle in your hand.
The good news is that a garage door, some painter’s tape, and 20 focused minutes at home can do more for your game than most open play sessions. This article breaks down exactly how to set up a legitimate home practice space, which drills actually transfer to match play, and where the limits of solo training are so you don’t waste time on things that won’t help.
Why Home Drills Beat Another Night of Open Play
Let’s be honest about what open play actually gives you. In a typical hour of recreational doubles, you might touch the ball 60 times across every shot imaginable — serves, returns, dinks, drives, resets, lobs. Each of those shots is different, each comes at a different pace, and there’s no repetition happening on any single skill.
Now compare that to 20 minutes of focused wall work at home. You can easily get 300 contacts on one specific shot. That’s not a marginal difference — it’s the difference between exposing yourself to a skill and actually building it. This is the core reason players describe going from a 3.0 to 3.5 rating and pointing to solo drilling as the thing that actually moved the needle.
There’s real science behind why this works. Constraint-based drills that use wall-rebound targets sharpen paddle face control and hand-eye coordination, according to research highlighted by ACE Fitness, because every single contact gives you immediate, unfiltered feedback. If you miss your target, you know it instantly. The wall doesn’t soften the truth for you or let you blame the ball bounce. That honesty is exactly what surfaces technique errors you didn’t even know you were making.
Most players have this backwards. They treat home practice as a consolation prize for when they can’t get court time. In reality, live play is where you test the mechanics you’ve already built. Home practice is where the building happens. Nobody developed elite hands in a casual round robin.
Understanding the Non-Volley Zone: Why the Numbers Matter for Your Setup
Before you tape anything on your wall, you need to know the dimensions you’re replicating, because practicing to the wrong measurements quietly builds the wrong muscle memory.
The non-volley zone — commonly called the kitchen — is the 7-foot strip on each side of the net where you cannot volley the ball out of the air. According to the USA Pickleball Official Rulebook, a regulation court is 20 feet by 44 feet, the kitchen line sits exactly 7 feet from the net, and the net measures 36 inches at the sidelines and 34 inches at center.
Those three numbers — 34 inches, 36 inches, and 7 feet — are what your home setup needs to reflect. If you borrow a badminton net at 60 inches or grab whatever’s in the garage without adjusting, you’ll spend weeks training a swing path that works for a completely different sport. When you finally get on a real court, everything will feel wrong and you won’t understand why.
Tape a horizontal line at 34 inches on your garage door or flat wall to represent center net height. Add a second line at 50 inches. Anything you hit between those two lines during your drills represents a legal dink or a controlled low drive. Step back 7 feet and tape the floor. You now have a functional kitchen to practice from, and it cost you about four feet of painter’s tape.
For Players New to Pickleball: What Any of This Actually Means
If you’re newer to pickleball and some of this terminology feels unfamiliar, here’s the plain version. Pickleball is played on a court that’s roughly half the size of a tennis court. There’s a net in the middle, and on both sides of that net, there’s a 7-foot zone called the kitchen where you’re not allowed to hit the ball out of the air — you have to let it bounce first before you can play it from in there.
A huge part of the game is played right at the kitchen line, trading soft shots called dinks back and forth. The player with better control at that line, with softer hands and more consistent placement, usually wins the point. That’s why so many home drills focus on simulating that distance and that net height — you’re training your hands and eyes to handle the most critical part of the game.
What makes home drilling so useful is that you don’t need a partner, you don’t need to book a court, and you don’t need a lot of space. A wall, some tape, and a ball is genuinely enough to improve your control faster than most people expect.
The Best Pickleball Drills You Can Do at Home
These five drills cover the shots and movement patterns that actually show up in matches. All of them work in under 100 square feet, and each one targets a specific weakness most players already know they have.
1. Continuous Wall Volleys
This is the foundation of any serious home practice routine. Stand 7 feet back from your wall with your paddle up and ready, and rally continuously below your 50-inch line. Count your contacts. Getting to 200 without a miss is a real, meaningful session. This drill is the backbone of pickleball wall drills and it will expose a grip that’s too loose or too tight within about 90 seconds. There’s nowhere to hide bad mechanics when the ball comes straight back at you every single time.
2. Target Dinking
Chalk or tape a 12-inch box just above your 34-inch net line. Alternate between forehand and backhand dinks, keeping your hands soft, and aim for 10 in a row on each side before you take a break. The small target forces precision that a vague “hit it over the line” approach never develops. This is the solo version of the same principle that makes the figure-8 drill effective with a partner.
3. The Fridge and Toaster Drill
Mark two targets on your wall — one at chest height (the fridge) and one at shoulder height (the toaster). Alternate between them, switching hands as you go. This trains the two body zones you’ll actually attack during a match when you’re at the net. The fridge and toaster drill translates directly to a more reliable backhand volley and faster hand transitions under pressure.
4. Serve Toss Repetition
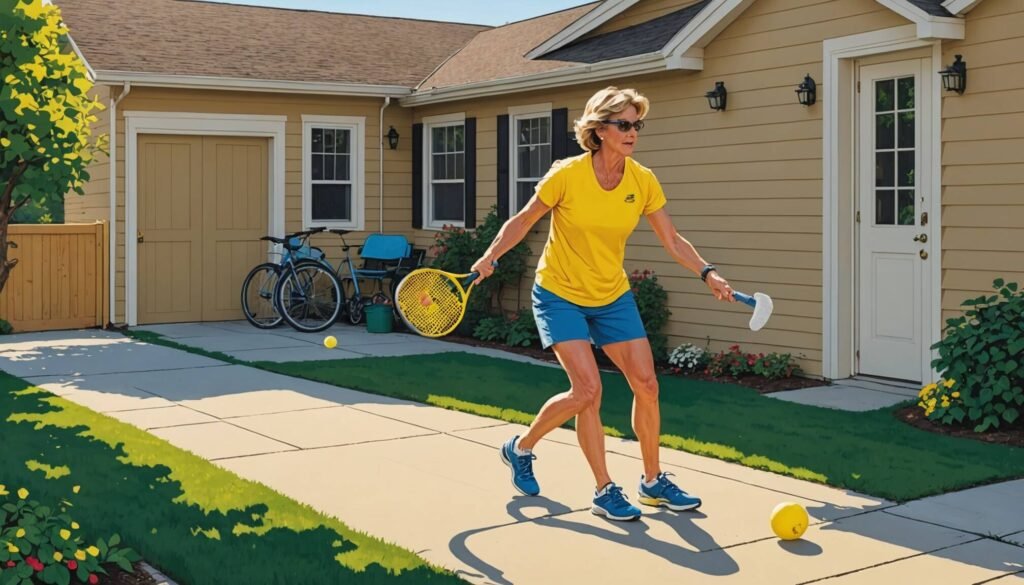
You don’t even need a wall for this one. Take 20 reps in the driveway focused entirely on the release point of your serve toss, not on ball flight, not on where it lands. Just consistency in how the ball leaves your hand. A repeatable toss is the foundation of every serve worth calling a weapon. Without it, you’re starting every point on unstable ground.
5. Shadow Resets
This one looks a little ridiculous and works extremely well. Get into your ready stance, paddle out front, knees bent, and practice absorbing an imaginary hard drive into an imaginary kitchen. No ball, no wall. Just the movement and the soft-hands position. Shadow work builds the muscle memory of a proper reset — the quiet, absorbing contact that kills pace instead of feeding it back. It sounds too simple to matter until you notice your resets suddenly staying low.
Footwork and Balance Drills You Can Do at Home
Most players focus all their home time on hand skills and completely skip footwork. That’s a mistake that shows up in the third game of a match when your legs are gone and every split step feels like you’re moving through sand.
Research published in the Journal of Strength and Conditioning Research has associated lateral agility work and structured deceleration training in paddle sports with measurably better dynamic balance and neuromuscular control during match conditions. That’s not a small peripheral benefit — that’s the difference between being in position and being a half-step late.
Practically, the implementation is simple. Set two cones 12 feet apart and do five minutes of side shuffles between them. Then do five minutes of split-step timing off a wall bounce, where you watch the ball hit the wall and practice landing your split step right as it makes contact. Build both into your home routine twice a week, not every session. Overloading footwork work every day is how you get too tired to do any of it well. And always warm up first — cold muscles and quick lateral cuts on a garage floor are a bad combination.
What Home Drills Cannot Fix
This part matters as much as everything above, and anyone who glosses over it is leaving you with an incomplete picture.
Wall practice is excellent for paddle control and reaction speed. It cannot replicate live opponent spin, unpredictable ball trajectories, or the decision-making that happens in real game situations, as noted by ACE Fitness research on constraint-based training. The rebound speed off a garage door or drywall is also faster than a ball coming off a real paddle, which means your timing will feel rushed during home sessions and slightly slow when you get back on court. That’s completely normal — your brain will recalibrate quickly.
Three things will always require a real court no matter how good your home routine gets: shot selection under pressure, partner communication, and stacking. You can drill your hands into shape at home, but reading an opponent’s body language and deciding in real time whether to speed up or reset the ball — that’s a skill that only develops against an actual human being trying to beat you.
The right mental model is this: build your mechanics at home, test them on court, identify what broke, come back home and fix it. Your return of serve is one of the fastest places to see whether your home reps have actually taken hold. If your returns are landing deeper and more consistently, the work is transferring.
Safety Before You Start Sliding Around Your Garage
One genuinely important warning before you clear a space and start drilling. Acute lower-body injuries in paddle sports — ankle sprains, calf strains — are frequently caused by sudden lateral stops or direction changes on smooth indoor flooring without proper footwear, according to data from PubMed. Polished hardwood in socks is not a practice surface. Neither is a dirty driveway where you haven’t checked for loose gravel or wet spots.
Running shoes are also not a substitute for court shoes. They’re built for straight-ahead movement and don’t provide the lateral edge support that pickleball’s side-to-side movement demands. Wearing them for aggressive lateral drills is a real injury risk, not an unlikely one.
Keep a clear buffer of at least 3 to 5 feet around your entire drill zone so you’re not crashing into furniture or a wall on a hard lateral step. Wear actual court shoes with proper lateral support. If your feet take a beating on concrete, insoles designed for court sports can help. Set your space up like a real training environment, not like a casual experiment in the basement.
How to Structure Your Home Sessions
Twenty focused minutes will outperform an unfocused hour every single time. Pick two drills per session, set a rep target for each, and stop when your quality noticeably drops off. Grinding through bad reps doesn’t build good mechanics — it builds tired, sloppy mechanics.
Three or four short sessions spread across the week produce more measurable improvement than one long weekend grind. If you can do one session focused on hand skills, one focused on footwork, and one that mixes both, you’re already doing more structured work than the vast majority of recreational players.
One underrated addition to any home routine: non-dominant hand work. A few minutes of wall volleys with your off hand costs you nothing and builds the kind of hand awareness that pays off in awkward-angle situations during actual matches. It feels weird at first. That’s the point.
Key Takeaways
- Home pickleball drills deliver 4 to 5 times the reps per shot compared to recreational play, which is why solo work builds mechanics faster than open play ever will.
- Use 34 inches for net height and 7 feet for your kitchen line. Wrong measurements train wrong muscle memory, and you won’t notice the problem until you’re already on court wondering why your dinks feel off.
- Wall drills fix hands, small targets fix precision, shadow footwork fixes balance. Match reading still requires a real opponent.
- Wall rebounds are faster than live shots. Expect your timing to feel slightly slow when you first get back on court — give yourself a few points to recalibrate.
- Always wear court shoes with lateral support and clear at least 3 to 5 feet of space around your drill zone before you start any aggressive lateral movement.
- Twenty focused minutes on two drills beats an hour of unfocused hitting. Rep quality matters more than rep quantity.
Frequently Asked Questions
How do you practice pickleball at home with no court?
Tape a net-height line at 34 inches on a garage door or flat wall, step back 7 feet, and start rallying. That single setup covers dinks, volleys, and resets without needing a full 20-by-44-foot court. Add shadow footwork between two cones for movement training and use your driveway for serve toss repetition work.
What are the best home pickleball drills for beginners?
Continuous wall volleys and target dinking are the two highest-return starting points because both give immediate feedback on your paddle face angle and contact point. Ten minutes of each will start cleaning up your mechanics faster than most beginners expect. The feedback loop from the wall — miss the target and you know it instantly — is genuinely more useful than most partner drill feedback at the beginner level.
Can you actually get better at pickleball by practicing alone?
Yes, meaningfully so, but within specific limits. Solo work builds paddle control, hand speed, consistency, and footwork — all of which transfer directly to match play. What it cannot build is shot selection under pressure or partner chemistry. Treat home practice as essential development work that supplements court time, not as a replacement for it.
How long should a home practice session be?
Twenty focused minutes is enough if you’re deliberate about it. Pick two drills, set a rep target, and stop when quality drops. Three or four short sessions per week will produce more improvement than one long session squeezed into a weekend.


